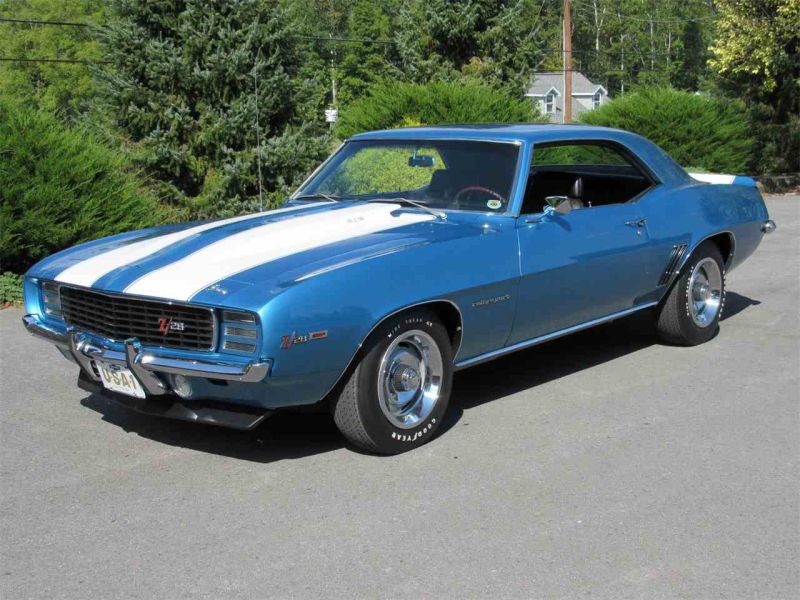
69 Camaro

Model Build
Model Build: Mar, 2018
Model Maker: Revell
Scale: 1:25
Model: 69 Camaro
Markings: White Hood Decals
Paint: Testors Enamel
I decided to build this model because it was very similar to the 1972 Camaro I had as my first car. I did a lot of work on that car (headers, lift kit, 4 barrel carb, hush thrush exhaust, chrome, etc.). My Camaro had a similar paint job, blue with big white decals down the hood and trunk.
I built this model before I decided to write them up on the blog so, like the P51 I only have completed pictures.
This build was a bit of a disappointment. The parts often did not have any guidance on how the fit together so you had to just place the part based on the drawing and then hold it in place until the glue dried. This is where I started using more of the super glue for quick drying. The engine, as an example had all these little parts that had to be painted and hand placed (no slots or grooves to align) only to be totally covered up by the next parts. Fitting the engine into the body was challenging. Getting the exhaust on was challenging.
For the body paint I had planned to use a metallic blue. Had major trouble using this paint with the air brush. It kept spattering no matter how I cleaned the air brush or thinned the paint. Finally I figured I had to to remove the air brush nozzle for a deep clean. Well, using the tool provided to remove it, it twisted off and broke. Goodbye air brush. So, I bought a new air brush and upgraded from the Chinese knock off I first purchased to an Iwata air brush.
Unfortunately, I still had trouble with the metallic paint so, bailed on that and just use a gloss blue. Finally was able to get a really nice paint job on the exterior so it does look pretty good.
Other irritating things about this model was instead of some chrome parts for the Camaro logos you had to free hand painting the silver. Not Ideal.
Finally, when I was ready to add the hood to the car, turned out the engine (after adding all the various parts to it) was too high and the hood did not fit. So, I had to tear down the engine and refit some things.
The hood is supposed to be able to be closed and open (to reveal all those detailed engine and engine compartment parts I worked so much on). But, it turns out you really cannot open the hood easily and it does not stay open when you do. So, lots of wasted effort on a bunch of hidden components.
Finally, the decals which worked so well on the P51 project were not very good on this project. The signature white decals on the hood and trunk where no size properly and totally covered the hood and trunk openings so, I had to cut them.
Summary
Not a very fun model to build. Will think twice about doing another car model. However, the end result (with hood closed) still looks really nice and I am glad I have it to remind me of my 72 Camaro I bought when I was sixteen.